Piezoelectric sensing material
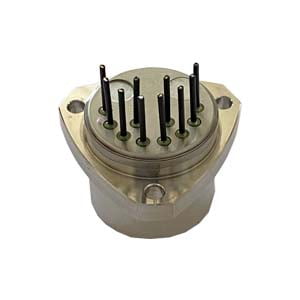
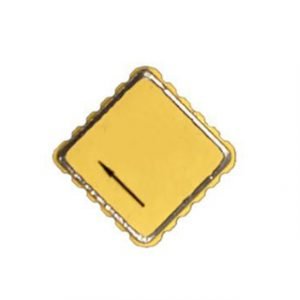
The two kinds of piezoelectric materials used in accelerometer design are mainly quartz and polycrystalline ceramics. Quartz is a naturally occurring crystal. However, the quartz used in today's sensors is created from impurity free materials. On the other hand, ceramic materials are manufactured by hand. Ceramic materials produced with different specific components have specific sensing properties. Each material has unique advantages, and the selection of materials depends on the characteristics of the accelerometer's special performance.
Quartz
It is well known that quartz can be used to perform precise measurement tasks and is helpful for measuring a large number of time and frequency in daily applications, such as watches, radios, computers and household appliances. Accelerometers also benefit from some unique properties of quartz. Since quartz is a natural piezoelectric material, it has no tendency to relax to another state and is the most stable of all piezoelectric materials. Therefore, the quartz based sensor can make consistent and repeatable measurements and can be maintained for a long time. In addition, quartz has no temperature fluctuation output, which is its great advantage in the thermal active environment. Because of its low capacitance and high voltage sensitivity compared with most ceramic materials, quartz is an ideal choice for voltage amplification systems. On the contrary, the low charge sensitivity of quartz limits its application in charge amplification system, and the low noise of the system is an inherent characteristic.
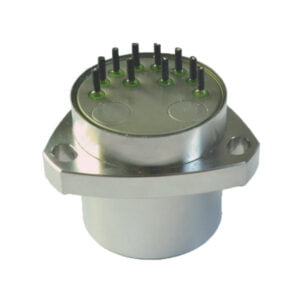
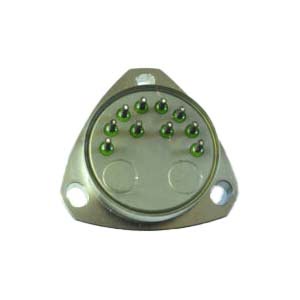
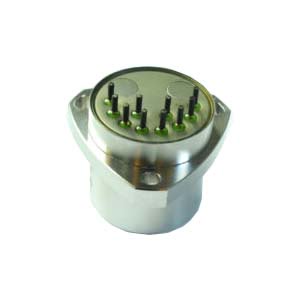
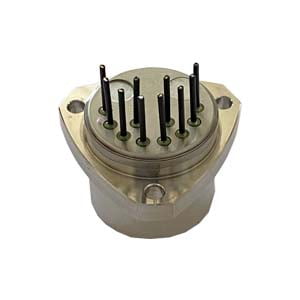
Ericco is a top quartz accelerometer manufacturer in China. We provide various quartz accelerometers solutions, such as aerospace quartz accelerometers,high performance quartz accelerometers, low cost and small size quartz accelerometers. If you want more technical information or datasheets, please feel free to contact us!
Ceramics
A variety of ceramic materials are used to make accelerometers, and the material used depends on the requirements of the specific application. All ceramic materials are manufactured manually and are made into piezoelectric materials through a polarization process. This process is called "polarization", which exposes the material to a high-intensity electric field and aligns the electric dipole, resulting in the material becoming a piezoelectric material. Using crystals of the same size, ceramics provide a higher output than quartz. This is the ideal choice for obtaining large output from small sensors. Different ceramic packages may be used to determine factors such as charge sensitivity, voltage sensitivity and temperature range. The charge output ceramic can cooperate with the built-in charge amplifier circuit to obtain high output signal, high resolution and excellent signal-to-noise ratio. High temperature ceramics are now used to make charge mode accelerometers, with operating temperatures exceeding 900° f (482° C).
Structure of piezoelectric accelerometer
Various mechanical structures can be used to perform the transfer principle required for a piezoelectric accelerometer. These configurations are defined by the properties of the piezoelectric material in which the inertial force of the acceleration mass acts. Compression mode, bending mode and shear mode describe the stress properties acting on piezoelectric materials. At present, the design of IMI accelerometer is almost entirely based on shear operation mode. Therefore, the information provided herein is limited to the shear mode accelerometer.
Cut mode
The design feature of shear accelerometer is that the sensing crystal is attached between the central column and the seismic mass. A compression ring or screw applies a preload force to the element assembly to ensure rigid structure and linear behavior. Under the action of acceleration, the mass produces a shear stress acting on the sensing crystal. Due to this stress, the piezoelectric material generates a proportional electrical signal output, which is collected by the electrodes and transmitted to the ICP sensor built-in signal conditioning circuit or directly to the electrical connector for the charging mode type. By isolating the sensing crystal from the base and the housing, the shear mode accelerometer helps to eliminate the effects of thermal transients and base bending. In addition, the geometric size of the shear itself is small, which reduces the impact of the mass load on the test structure while improving the high-frequency response. Combined with its ideal characteristics, the shear mode accelerometer has the best performance.
Sensor mounting and frequency response
The most important factor in installing an accelerometer is to consider the influence of the installation technology on the accuracy of the available frequency response. In most cases, the operating frequency range of the accelerometer is determined by fixing the test sensor directly to the reference standard accelerometer with screws. Direct screw mounting is coupled to a very smooth surface and generally produces the highest mounting resonance frequency and the most widely used frequency range. Adding any mass to the accelerometer, such as adhesive or magnetic mounting base, will reduce the resonance frequency of the sensing system, and may affect the accuracy and limit the available frequency range of the accelerometer. In addition, flexible materials, such as rubber interface gaskets, produce a mechanical filtering effect by isolating and preventing high-frequency transmission.
Surface treatment
For the best measurement results, especially at high frequencies, prepare a smooth and flat machined surface at the accelerometer attachment position. Check the area to ensure that no metal burrs or other irrelevant particles are attached to the contact surface. Using a thin layer of silicone grease between the accelerometer base and the mounting surface can also obtain a high degree of intimate surface contact required for high frequency transmission.
Bolt installation
For permanent installation, the accelerometer needs to be attached to the test structure very safely, and bolt installation is recommended. First, according to the manufacturer's specifications, grind or process a smooth, flat area on the test object that is at least as large as the sensor base. Then, prepare a threaded hole according to the provided installation drawing, and ensure that the threaded hole is perpendicular to the installation surface. Install the accelerometer with mounting bolts and make sure that the bolts do not touch the mounting surface or the bottom end of the accelerometer base. Most IMI mounting bolts have depth limiting shoulders to ensure that the bolts do not reach the lowest point of the accelerometer base. Each base contains a counterbore so that the accelerometer does not rest on the shoulder. The acceleration is transmitted from the mechanism surface to the accelerometer base. Any bolt touching the bottom or intervening between the accelerometer base and the structure will inhibit the acceleration transmission and affect the measurement accuracy. When tightening, only apply the recommended torque to the accelerometer. Apply a thread locking compound at the thread of the mounting bolt to prevent loosening.
Screw installation
When installing an accelerometer on a thin-walled structure, it is feasible to fix the accelerometer to the structure through a hole surface with a sufficient diameter with a cap screw. The screw engagement length should always be checked to ensure that the screw does not touch the bottom of the accelerometer base. Apply a thin layer of silicone grease on the installation surface to ensure high-frequency transmission.
Adhesive installation
Installation with screws or bolts is not always feasible. Adhesive mounting provides another mounting method. It is recommended to use a separate adhesive to mount the base to prevent the adhesive from damaging the accelerometer base or blocking the mounting threads. Micro accelerometers usually include integral mounting bolts, which can be machined to form a flat base. Most adhesive mounting bases for PCBs also provide electrical isolation, eliminating potential noise interference and ground loop problems.
The recommended type of adhesive depends on the particular application. Petroleum Wax (available from PCB) provides a very convenient and easy to disassemble method for use at room temperature. The two-part epoxy resin is rigid to maintain high frequency response and make the installation a permanent installation. Other adhesives, such as dental cement, hot glue, fast adhesive, and pipe putty with successful cases are also feasible. No "best" adhesive can be used for all applications because of many different structural and environmental factors, such as temporary or permanent installation, temperature, surface finish of the structure, etc.
In order to avoid damage to the accelerometer mounted with the permanent adhesive, a release agent must be applied to the adhesive before removing the sensor. There are many adhesives that can be used (super glue, dental cement, epoxy resin, etc.), but there is no general peeling agent. Loctite 454 adhesive, the recommended dissociating agent for PCB is acetone. If you are using anything other than loctite 454, you will have to check the peeling agent recommended by the independent manufacturer. In order to fully react with the adhesive, the release agent must be able to penetrate the surface, so it is best to wait for several minutes before removing the sensor after the release agent is applied. Once the peeling agent has been applied, you can use an ordinary hexagonal or square base open-end wrench to apply a gentle shear force (or twist) action (only by hand), and the sensor can be removed from the test structure. A base, square base or micro droplet accelerometer provides a removal tool for shear motion.
Magnetic mounting
The magnetic base provides a very convenient method of temporarily attaching to the surface of the magnet. The high tensile strength of the magnet provides the best high frequency response. The wedge-shaped double rail magnetic base is generally used to install equipment on curved surfaces, such as motor, compressor housing and pipes. However, dual track magnets generally greatly reduce the operating frequency range of the accelerator. For the best measurement results, the magnetic base should be attached to a smooth and flat surface. A thin layer of silicone grease shall be used between the sensor and the magnetic base and between the magnetic base and the structure to improve the continuity of surface contact. When the surface is uneven or non-magnetic, the steel gasket can be welded or bonded to the corresponding position with epoxy adhesive to bear the magnetic base.
Note: magnetically mounted accelerometers may produce very high and harmful acceleration levels. To prevent this damage, be careful when attaching the magnet to the test structure, and gently "knock" or "slide" it into place. Do not let the magnet "crack" and produce excessive "impact" on the test structure. These "shocks" may damage the sensor. Another more ideal installation method is to attach the magnetic base to the test structure, and then screw the accelerometer to the base.
More Technical Questions
1.Why do we Need Accelerometer?
2.How do parameters affect the performance of the quartz accelerometer?
3.Quartz Accelerometer VS MEMS Accelerometer
4.What is the Purpose of the Accelerometer Senor?
5.What can you do with an Accelerometer?
6.What Effect Does Temperature Have on Quartz Flexible Accelerometer?
Products in Article
